My most recent art quilt was made for a little girl's 2nd birthday present. She was extra lucky though, as she got it when she was 2.5 instead! This quilt was meant to be a simple wall hanging (once again it's a smaller piece), but ended up being more complicated due to the excessive zig-zag/satin stitching involved. More on that later.
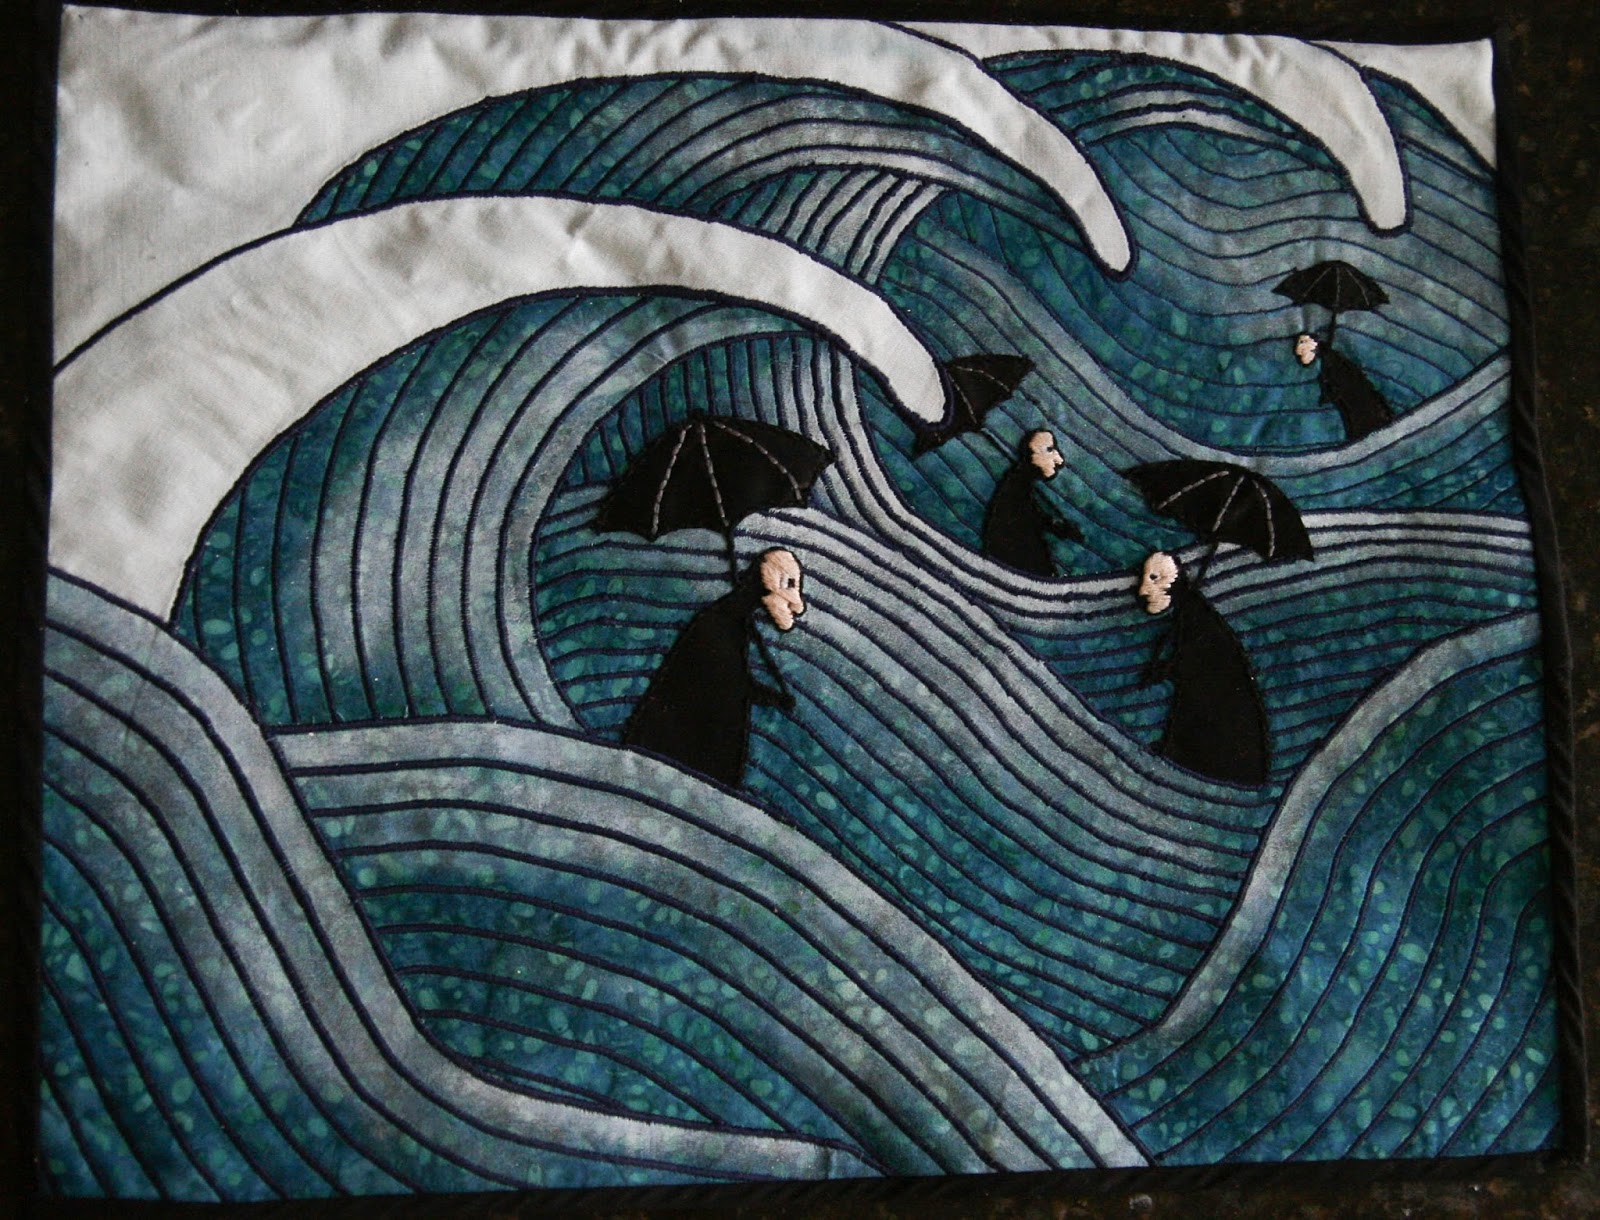
The quilt was based on the amazing artwork done by Pete Revonkorpi. The image of the original picuture seen below has been mirrored. You can find the original on his website linked.

The hardest part in the planning for this piece was getting the gradient of color for the waves. I was not able to find fabric that had the gradient that I wanted or would be able to use, and using small pieces to graduate the color would be problematic (to say the least) with the size scale I was using. Eventually I decided to use fabric paint applied after I had cut the applique pieces out.
I used a textured white paint that had a slight foaming effect. I experimented with spraying the paint directly out of the spray bottle, but this didn't give me as much control as I wanted. Eventually I just used a dry brush technique to apply the paint. Once all the pieces were painted and ironed on (I used raw-edge applique with double-sided fusible webbing), I got to work on the embroidery.

The embroidery was relatively simple for this project, as the tunics and umbrellas of the little men were applique. I did take care to try and keep the shape of the 'raincoats' intact with the faces though, and to include a bit of character through mouth placement and the way the nose was sewn in. It was rather fiddly work. Eventually though, I loved my little umbrella men :D

With the embroidery complete, it was time to start the quilting. This was going to be a 'simple' process of small zig-zag lines following the waves. Instead it was incredibly hard and very slow-going. The lines started off thin in the background sections, and got larger towards the foreground, as you can see from the above picture. The smaller lines were really difficult to do, as the needle movement was so tiny, it was difficult to see what was going on and to maintain a steady line without rushing forward and stretching the stitch. Trying to maintain a steady line with the stitch-length was quite difficult to do, but got easier the wider the stitch length became. By the time I got to the fore-ground waves it was very easy (if a bit slow) to create the lines.
The other difficulty was sewing around the men. As you can see above, the lines get a bit mangled when approaching the face. This is again due to issues with stitch length, and probably nerves. The closer I got to the face, the slower my foot became, and the more out-of-sync with the rhythm. I ended up having to go over the lines again to fill in the gaps.

Eventually all the stitching was completed though, and the back looked almost as impressive as the front! to finish it up, I sewed in a metal rod for hanging, which also helps keep the quilt straight. All the parallel satin stitching made the quilt buckle a bit, but the rod helps it to hang straight. In the end these little art quilts are so much fun to make. The choosing, planning and working out exactly how you're going to accomplish it (and scrapping your idea when you find it's not going to work, then rinse and repeat), it just creates the best challenge. Then seeing your final product up on a wall, well that's magic :)
Keeping playing everyone!
XXOO
Pippa


